Instrumentation Free


Surgical instrumentation has become exponentially more complex in recent decades. I believe simplicity in instrumentation is key to operative efficiency.
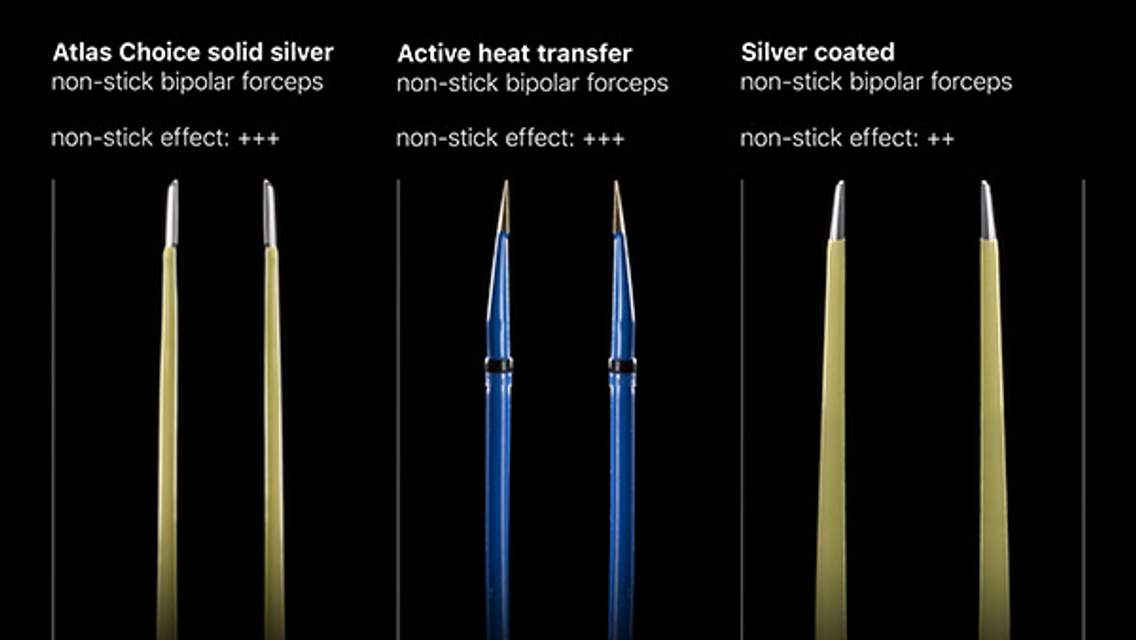
ATLAS Choice Bipolar Forceps
Designed for your every surgical maneuver
Five tip sizes for brain and spine procedures
Unparalleled non-stick and low-profile features

Figure 1: Cushing’s instrument table in late 1920’s. Please note the use of Bovie electrocautery on the left hand side (Courtesy of Cushing Brain Tumor Registry at Yale University).
The surgeon’s operative maneuvers should follow one another seamlessly, similar to movements in a concerto flowing together to form a masterpiece. This virtuosity is founded upon movements that meld together without hesitation. To achieve this level of technical competence and finesse, the surgeon must have a mastery of the desirable macro and micro instruments. This chapter reviews the basics of equipment and instrumentation.
Every operator should be intimately familiar with his or her “special” set of instruments. This set should be very abbreviated and each instrument should be exploited for numerous maneuvers (multifunctional) to advance operative efficiency. Simplicity is the key to technical adaptability and proficiency. The surgeon should be thoroughly familiar with the capabilities and limitations of each instrument. The way an instrument is used, and not the instrument itself, most often defines its success in achieving the operative goal at each single step.
Head Fixation
Because patient positioning is integral to successful surgery, an understanding of the equipment involved for head fixation is equally important. For surgeries that do not require strict head immobilization, such as cranial emergencies for hematoma evacuation, options include the various donut head holders and horseshoe headrests.
Procedures integrating stereotaxy or microsurgical techniques demand strict head fixation. The most commonly used head fixation device is the Mayfield skull clamp (Integra LifeSciences, Plainsboro, New Jersey) that uses three pins to fix the cranium.

Figure 2: A variety of head fixation devices exist and an understanding of their indications is important. The donut and horseshoe headrests (A and B, respectively) are best when firm stabilization is not required (that is, emergent cases or hematoma evacuation). The Mayfield skull clamp (C) is the most commonly used fixation device and can be combined with stereotaxy. The Sugita frame (D) is yet another option for stable cranial fixation. The Sugita uses four pins for cranial fixation and has its own self-retaining retractor system.
Although I rarely use fixed retractors, the skull clamps can be coupled to the Budde Halo Retractor System (Integra LifeSciences, Plainsboro, New Jersey) that allows a platform for the attachment of retractor blades and can also be used as an armrest or hand rest by the surgeon.

Figure 3: The Budde halo (left image) and Sugita (right image) retractors are self-retaining and can also serve as a handrest for the surgeon.
For more information, please see the Patient Positioning and Skull Clamp Placement chapters.
Operating Room Microscope
The microscope is an integral part of microsurgery. With its illumination, magnification, and stereoscopic imaging, this device expands the operator’s vision and allows microsurgery without the need for fixed retractors.
Proficiency with the microscope will dramatically advance one’s operative skill. With enough experience, the operator will realize that the microscope is virtually a part of his or her face. The flow of microsurgery is very dependent upon the interaction of the surgeon with the microscope. The microscope should not be used to conduct macrosurgery. Every stage of surgery requires a different magnification level. Operating under an unnecessarily high level of magnification can disorient the surgeon and lead to premature fatigue. Similarly, operating under a low magnification level can lead to undetected injury to the surrounding vessels or unintended residual tumor.
The use of a mouth switch dramatically improves operative efficiency. It obviates the need to use microscope handles to keep the image in focus.
Cranial and Dural Openings
The instruments for cranial and dural openings can and preferably should be standardized. The skin incision is made with a 10-blade scalpel and bleeding is controlled with bipolar electrocautery. Raney scalp clips can also be applied along the scalp edges to control bleeding. Frazier suctions are used to clear the operative field.
These suctions come in different sizes and allow for manipulation of the suction level by the finger of the operator. Muscle and galea may be reflected off the skull using a periosteal elevator. The scalp can be retracted using self-retaining retractors and fishhooks. Incisions on a flatter surface of the skull can be retracted using Weitlaner retractors. When incisions are on a curve, such as during a midline suboccipital craniotomy, Adson cerebellar retractors are more useful. I prefer to use fishhooks for most pterional and anterior skull base craniotomies because their force of retraction is more controlled and the muscle can be mobilized effectively along the trajectory of the subfrontal corridor.

Figure 4: Basic instruments of my choice for a standard craniotomy.

Figure 5: Fishhooks are very useful during reflection of the scalp and temporalis muscle. Their force of retraction can be directed toward specific locations obstructing the operative trajectory.
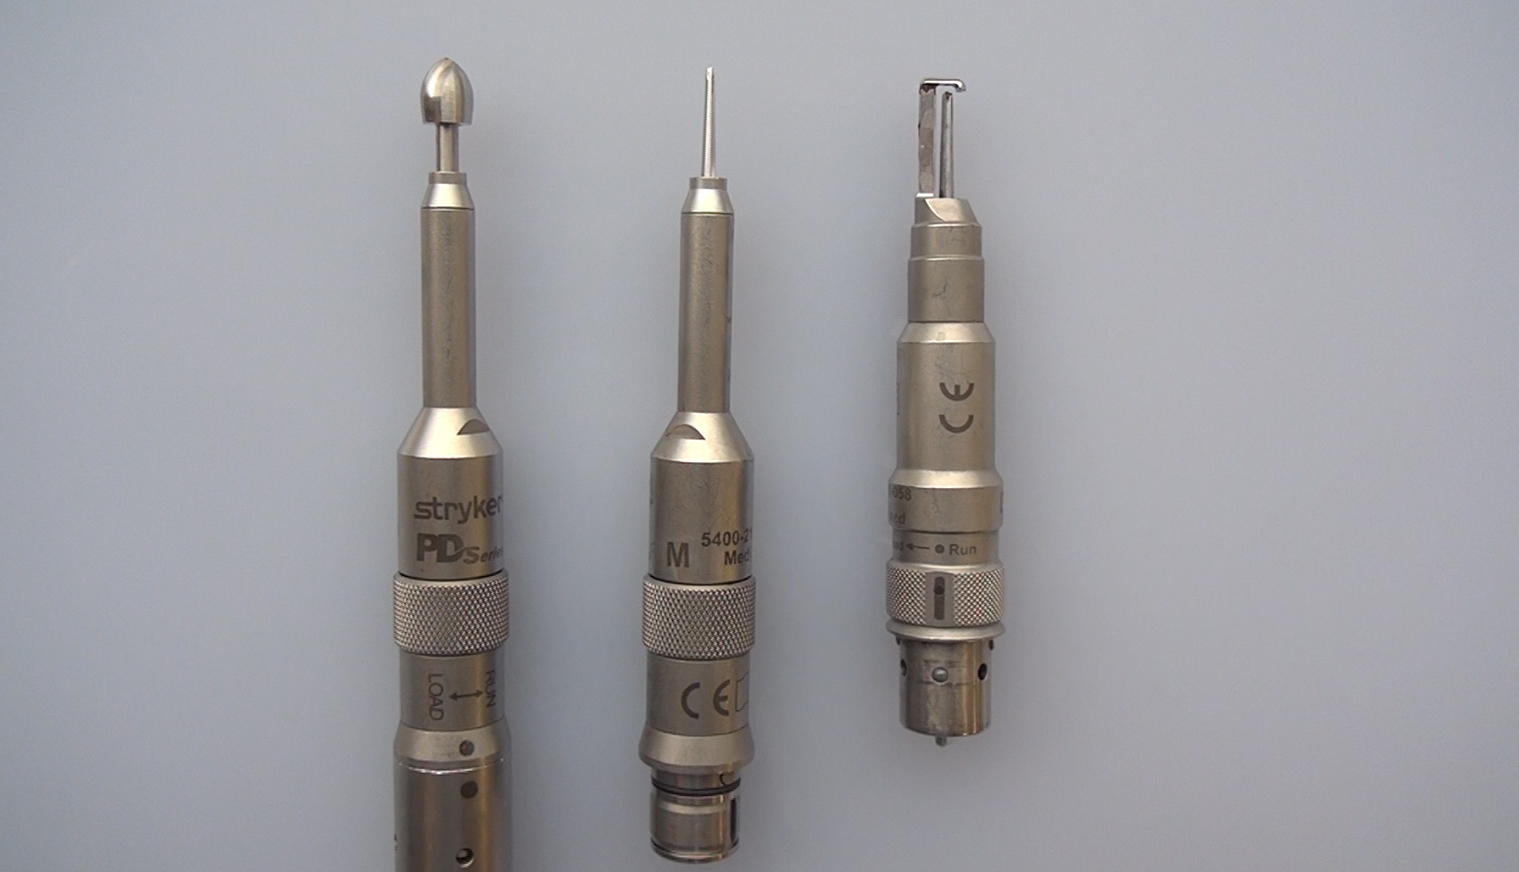
Figure 6: Burr holes are commonly made with a perforator clutch drill bit. These drill bits have an automatic stop mechanism when the inner table is penetrated and are typically 14 mm in diameter.
I prefer making burr holes with an acorn-shaped bit because the burr hole size can be controlled more effectively. The automatic stop mechanism of the perforator is not always sensitive or reliable enough to stop on time; this is especially problematic during placement of burr holes over the venous sinuses. For this reason, I routinely use an acorn bit.

Figure 7: Once the burr holes are created, the inner table bone fragments can be removed with a bone curette, or a #1 Penfield dissector. The dura is typically thoroughly stripped from the overlying inner table using a #3 Penfield. The Penfield instruments are among the most useful instruments for cranial opening and #1 and #3 dissectors are commonly used. The Penfield dissectors are demonstrated in these images; their numbers correspond to their order from top to bottom (upper image and left to right (lower image).
To make the craniotomy bony cuts, I use a high-speed side-cutting drill bit with a footplate to complete the osteotomy. The dura may be adhesive to the middle of the bone flap and a #3 Penfield dissector can be used to separate the dura.

Figure 8: Leksell and Kerrison rongeurs may be used for bone resection. Specifically, I remove the lateral sphenoid wing using Leksell rongeurs while burr holes can be expanded using Kerrison rongeurs. During a retromastoid craniotomy, the bone over the venous dural sinuses can be shelled out and subsequently removed using Kerrison rongeurs.
After elevation of the bone flap, a straight drill bit is used to create the holes for 2 or 3 dural tacking sutures around the edges of the craniotomy.
A 15-blade scalpel can be used to make the initial dural opening, and next, the Metzenbaum scissors extend the initial durotomy.
Microsurgical Instruments
For both oncological and vascular procedures, adherence to the principles of microsurgery is integral to the success of the operation. The opening of the arachnoid membranes can be made with an arachnoid knife and microscissors. The planes surrounding a lesion can be dissected using a variety of instruments, including Rhoton microdissectors. Sharp dissection protects blunt injury to the surrounding normal cerebrovascular structures.

Figure 9: The Rhoton instruments have different shapes and angles and thus provide flexibility to work within a variety of operative angles and small spaces.

Figure 10: Irrigation clears the operative field, hydrates the tissues, and prevents heat injury from the intense light of the microscope. I use a 10-cc syringe for irrigation during microsurgery.
For more details about instruments for skull base microsurgical procedures please refer to the Technical Nuances and Instrumentation chapter in the Skull Base Surgery volume.
Tumor Debulking/Lesion Removal
The texture and size of the tumor not only defines the risk of its resection, but also the instruments needed for its removal. Besides tumor forceps, pituitary rongeurs play an important role during tumor debulking and mobilization.
For fibrous skull base tumors adjacent to critical structures, I routinely use an ultrasonic tissue aspirator. This device allows aggressive internal debulking of the tumor while minimizing potential traction injury on the surrounding critical cranial nerves and brainstem.
Suction tips are often used as both a dissector and dynamic retractor. A thorough understanding of how to control suction power is necessary to avoid injuring sensitive structures.

Figure 11: Moist cotton patty strips come in different lengths and widths and are used for brain protection, hemostasis, retraction, and maintaining tumor borders.
Cranial Closing
After ensuring hemostasis, closure begins. If there is not enough native dura for a watertight closure, a duraplasty can be completed using a piece of pericranium. Synthetic dura substitutes and/or pericardium are selected based on the surgeon’s preference. I personally avoid their use because of the associated risk of aseptic inflammation and infection.
A plating system is used to reattach the bone flap. Typically, a combination of burr hole covers, plates, and 4-mm screws are used to secure the bone flap. Cranioplasty may also be necessary to reconstruct the cranium and avoid creating cosmetically undesirable skull defects. Scalp closure is usually done with absorbable 3-0 vicryl stiches in the galea and staples or nylon suture in the skin.
Pearls and Pitfalls
- Understanding and mastering the capabilities and limitations of neurosurgical instruments is critical for conducting successful operations.
- Development of a limited set of standard instruments dramatically improves the surgeon’s operative efficiency and minimizes the operating room staff’s confusion.
Please login to post a comment.