Basilar Aneurysm: Subtemporal Approach


An in-depth understanding of the anatomy of the interpeduncular fossa from the subtemporal corridor is necessary for clip ligation of the basilar bifurcation aneurysms through this route.
Although the transsylvian approach with its half-and-half modifications can reach most basilar bifurcation aneurysms, some low-lying aneurysms will not be amenable to this approach. This is particularly true if the aneurysm neck resides up to 5 to 10 mm below the dorsum sella as seen on a sagittal view of the computed tomography (CT) angiogram.
In addition, I do not favor the pterional route for posterior-projecting aneurysms because the vital thalamoperforators are buried behind the aneurysm and often not easily viewable through the subfrontal operative trajectory.
The subtemporal approach addresses both of these anatomic constraints. Unfortunately, the temporal lobe must be substantially retracted for the operator to gain access to the tentorial edge; this maneuver is difficult if not impossible in the setting of an edematous brain immediately after subarachnoid hemorrhage.
Thus, for ruptured aneurysms, the transsylvian approach is more favored for access to the interpeduncular cistern. In rare cases when a ruptured aneurysm cannot be accessed through the transsylvian approach, an inferior temporal gyrus resection or even a frank anterior temporal lobectomy is needed to prevent retraction injury with the associated risk of hemorrhagic conversion.
Finally, large anterior-projecting aneurysms can fill the interpeduncular cistern and complicate the pterional’s operative trajectory. In these cases, the subtemporal route is a more desirable alternative.
The following discussion refers to low-lying or posterior-pointing basilar bifurcation aneurysms. However, the same technical principles apply to similar superior cerebellar artery and basilar trunk aneurysms.
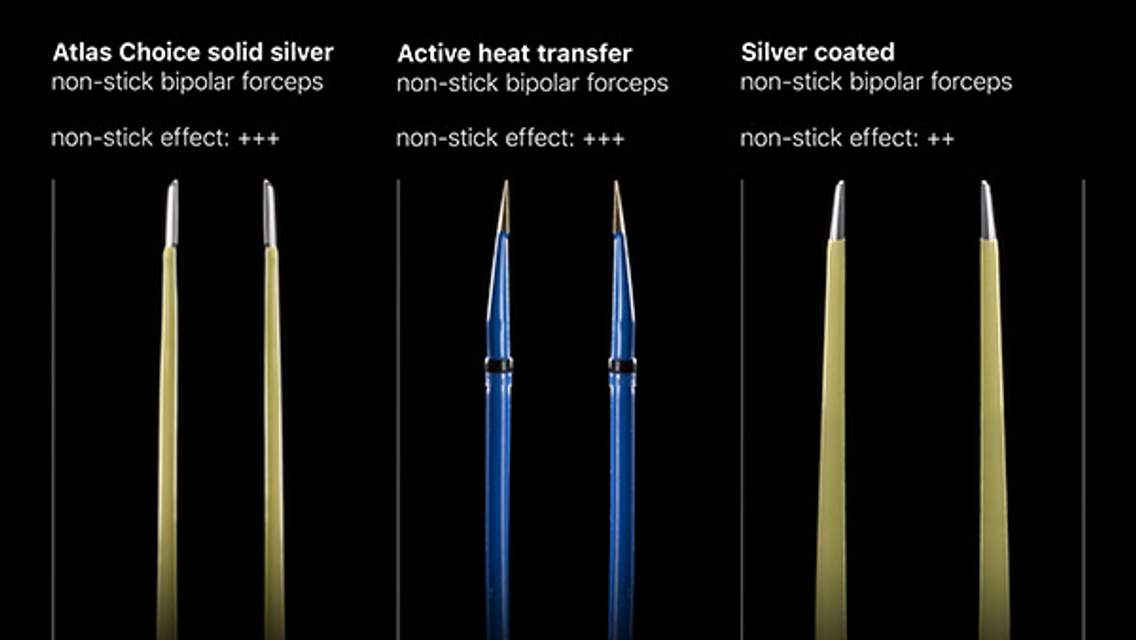
ATLAS Choice Bipolar Forceps
Designed for your every surgical maneuver
Five tip sizes for brain and spine procedures
Unparalleled non-stick and low-profile features
Indications for Microsurgery
With the widespread availability of effective endovascular methods for treatment of basilar artery aneurysms and the special technical expertise required to safely perform the intradural portion of the procedure described below, most basilar bifurcation aneurysms are currently treated via endovascular techniques. Highly calcified and posterior-projecting aneurysms are best suited for endovascular therapy.
Microsurgical ligation is still indicated in some circumstances when an endovascular approach is contraindicated, such as in the case of bilateral vertebral artery stenosis, tortuous vascular anatomy, large neck-to-dome ratio, or incorporation of a nonfetal P1 into the aneurysm neck.
Other circumstances also particularly favor microsurgery, such as the presence of a noncontiguous aneurysm thought to be more amenable to clipping than coiling, or the rare presence of a compressive hematoma requiring evacuation.
Preoperative Considerations
A thorough understanding of the relevant anatomy through careful study of the preoperative CT and catheter angiograms with three-dimensional reconstruction sequences is mandatory.
The relationship of the posterior clinoid process to the aneurysm, the extent of aneurysm calcification, the projection of the aneurysm dome, the presence of intraluminal thrombus, the dominance of the posterior cerebral artery (fetal), and the height of the shoulders of the P1 arteries relative to the neck, and the presence of an artery of Percheron are important considerations that alter operative planning. Please refer to the Basilar Artery Bifurcation Aneurysm: Pterional Approach chapter for further details.

Figure 1: A low-lying basilar bifurcation aneurysm with its neck located up to 1cm below the dorsum sella can be exposed via the subtemporal route.
The location of the indispensable vein of Labbé should be carefully considered because anteriorly-located veins can limit or prevent the safe use of the subtemporal operative corridor.
Operative Anatomy
The basilar artery ends at its quadrification within the interpeduncular fossa and divides into two posterior cerebral and two superior cerebellar arteries (SCAs). The P1 segment of the posterior cerebral artery (PCA) begins at this quadrification and ends at the junction of the posterior communicating artery and the PCA, where the P2 segment starts. The posterior communicating artery gives rise to the anterior thalamoperforating arteries along its superior and lateral aspects. These perforators supply the posterior hypothalamus, anterior thalamus, and posterior limb of the internal capsule.
The calibers of the posterior communicating artery and the P1 branch have a reciprocal relationship. A dominant or fetal posterior communicating artery is associated with a hypoplastic or absent P1 branch and vice versa.
The posterior thalamoperforators arise from the P1 segment of the PCA and basilar bifurcation. Care should be taken to prevent injury to these vessels during dissection as they lie in close proximity of the aneurysm neck and supply the posterior thalamus, hypothalamus, reticular formation, and posterior internal capsule. In addition, there are circumflex perforators that arise from the P2 segment and course medially toward the brainstem. Similarly, thalamogeniculate and peduncular perforators arising from the P2 segment of the PCA should be protected. Please refer to the Basilar Artery Bifurcation Aneurysm: Pterional Approach chapter for more anatomical details.

Figure 2: The left-sided subtemporal approach to the perimesencephalic and interpeduncular fossae is demonstrated (upper image). The oculomotor nerve is an important landmark to identify early so that the dissection is not inadvertently performed more posteriorly (lower images). The subtemporal route may be extended via transection of the tentorium for low-lying basilar bifurcation aneurysms (images courtesy of AL Rhoton, Jr).

Click here to view the interactive module and related content for this image.
Figure 3: The left-sided subtemporal approach to the basilar apex region is shown. The neurovascular anatomy is best illustrated in the middle row, left image. This exposure can be expanded via cutting the tentorium (lower row, left image) or an anterior petrosal osteotomy (lower row, right image) (images courtesy of AL Rhoton, Jr). Note the limited view of the contralateral P1 segment through this corridor. The oculomotor nerve is an important anatomic landmark in the region.
MICROSURGICAL CLIP LIGATION OF BASILAR BIFURCATION ANEURYSMS VIA THE SUBTEMPORAL ROUTE
Aneurysms arising from the basilar bifurcation may be approached using the extended pterional, modified orbitozygomatic, or subtemporal approaches. Please refer to the Basilar Artery Bifurcation Aneurysm: Pterional Approach chapter for more details.
Less commonly considered alternatives for basilar trunk aneurysms include the combined supra- and infratentorial presigmoid transpetrosal osteotomy.
Choosing the Side of Approach
The principle risk of this approach is retraction injury of the temporal lobe. As such, the approach should be from underneath the nondominant lobe whenever possible, although the presence of an oculomotor palsy or hemiparesis may outweigh this consideration.
In addition, if the shoulder of one of the P1 arteries is significantly higher than the other one relative to the aneurysm neck, the higher shoulder can be inadvertently compromised by the distal edge of the blades if it is within the operative blind spot. For this reason, an ipsilateral approach to the higher P1 shoulder is advocated.
Since there is no cistern available early in dissection and during elevation of the temporal lobe, a lumbar drain is placed preoperatively.

Figure 4: The incision, craniotomy, and dural opening are illustrated. For the technical tenets of the initial exposure, please refer to the Temporal/Subtemporal Craniotomy chapter. The linear incision can be transformed into a pterional incision if necessary and skin preparation should be made in select cases. The posterior dural incision should protect the vein of Labbé.
INTRADURAL PROCEDURE
Initial Exposure
Lumbar or ventricular cerebrospinal fluid (CSF) drainage significantly facilitates lobar mobilization and should be performed early. I drain approximately 40 to 50 cc of CSF (in 10 cc aliquots and up to 100 cc total) during dural opening and avoid forceful retraction of the lobe. Mannitol is administered as well. The vein of Labbé may tether the lobe down and the vein should be released from its arachnoid bands along its proximal 0.5 to 1.0cm subdural segment as safely as possible.
I avoid a fixed retractor blade until the later stages of the operation; I prefer a handheld suction device for dynamic retraction. The temporal lobe is elevated along the coronal plane at the level of the root of zygoma and the uncus is identified. If the brain is still too full, more CSF drainage should be permitted to increase brain relaxation.
If the use of CSF drainage and diuresis do not lead to adequate lobar relaxation, extracranial sources of venous outlet or endotracheal tube compromise are investigated. If the post-SAH brain remains “tight” despite all measures, persistence and aggressive temporal lobe retraction is fraught with complications such as life-threatening postoperative hemorrhagic infarction. If the perianeurysmal anatomy is not favorable for conversion to the petrional (“half-and-half”) route, the operation should be abandoned and a reoperation planned after the acute stage of subarachnoid hemorrhage. An inferior temporal gyrectomy and anterior temporal lobectomy are possible alternative solutions.
The oculomotor nerve is identified and left attached to the uncus. The arachnoid bands over the ambient cistern, the cerebral peduncle and the PCA branches should be readily visible. These arachnoid bands are generously and sharply disconnected.
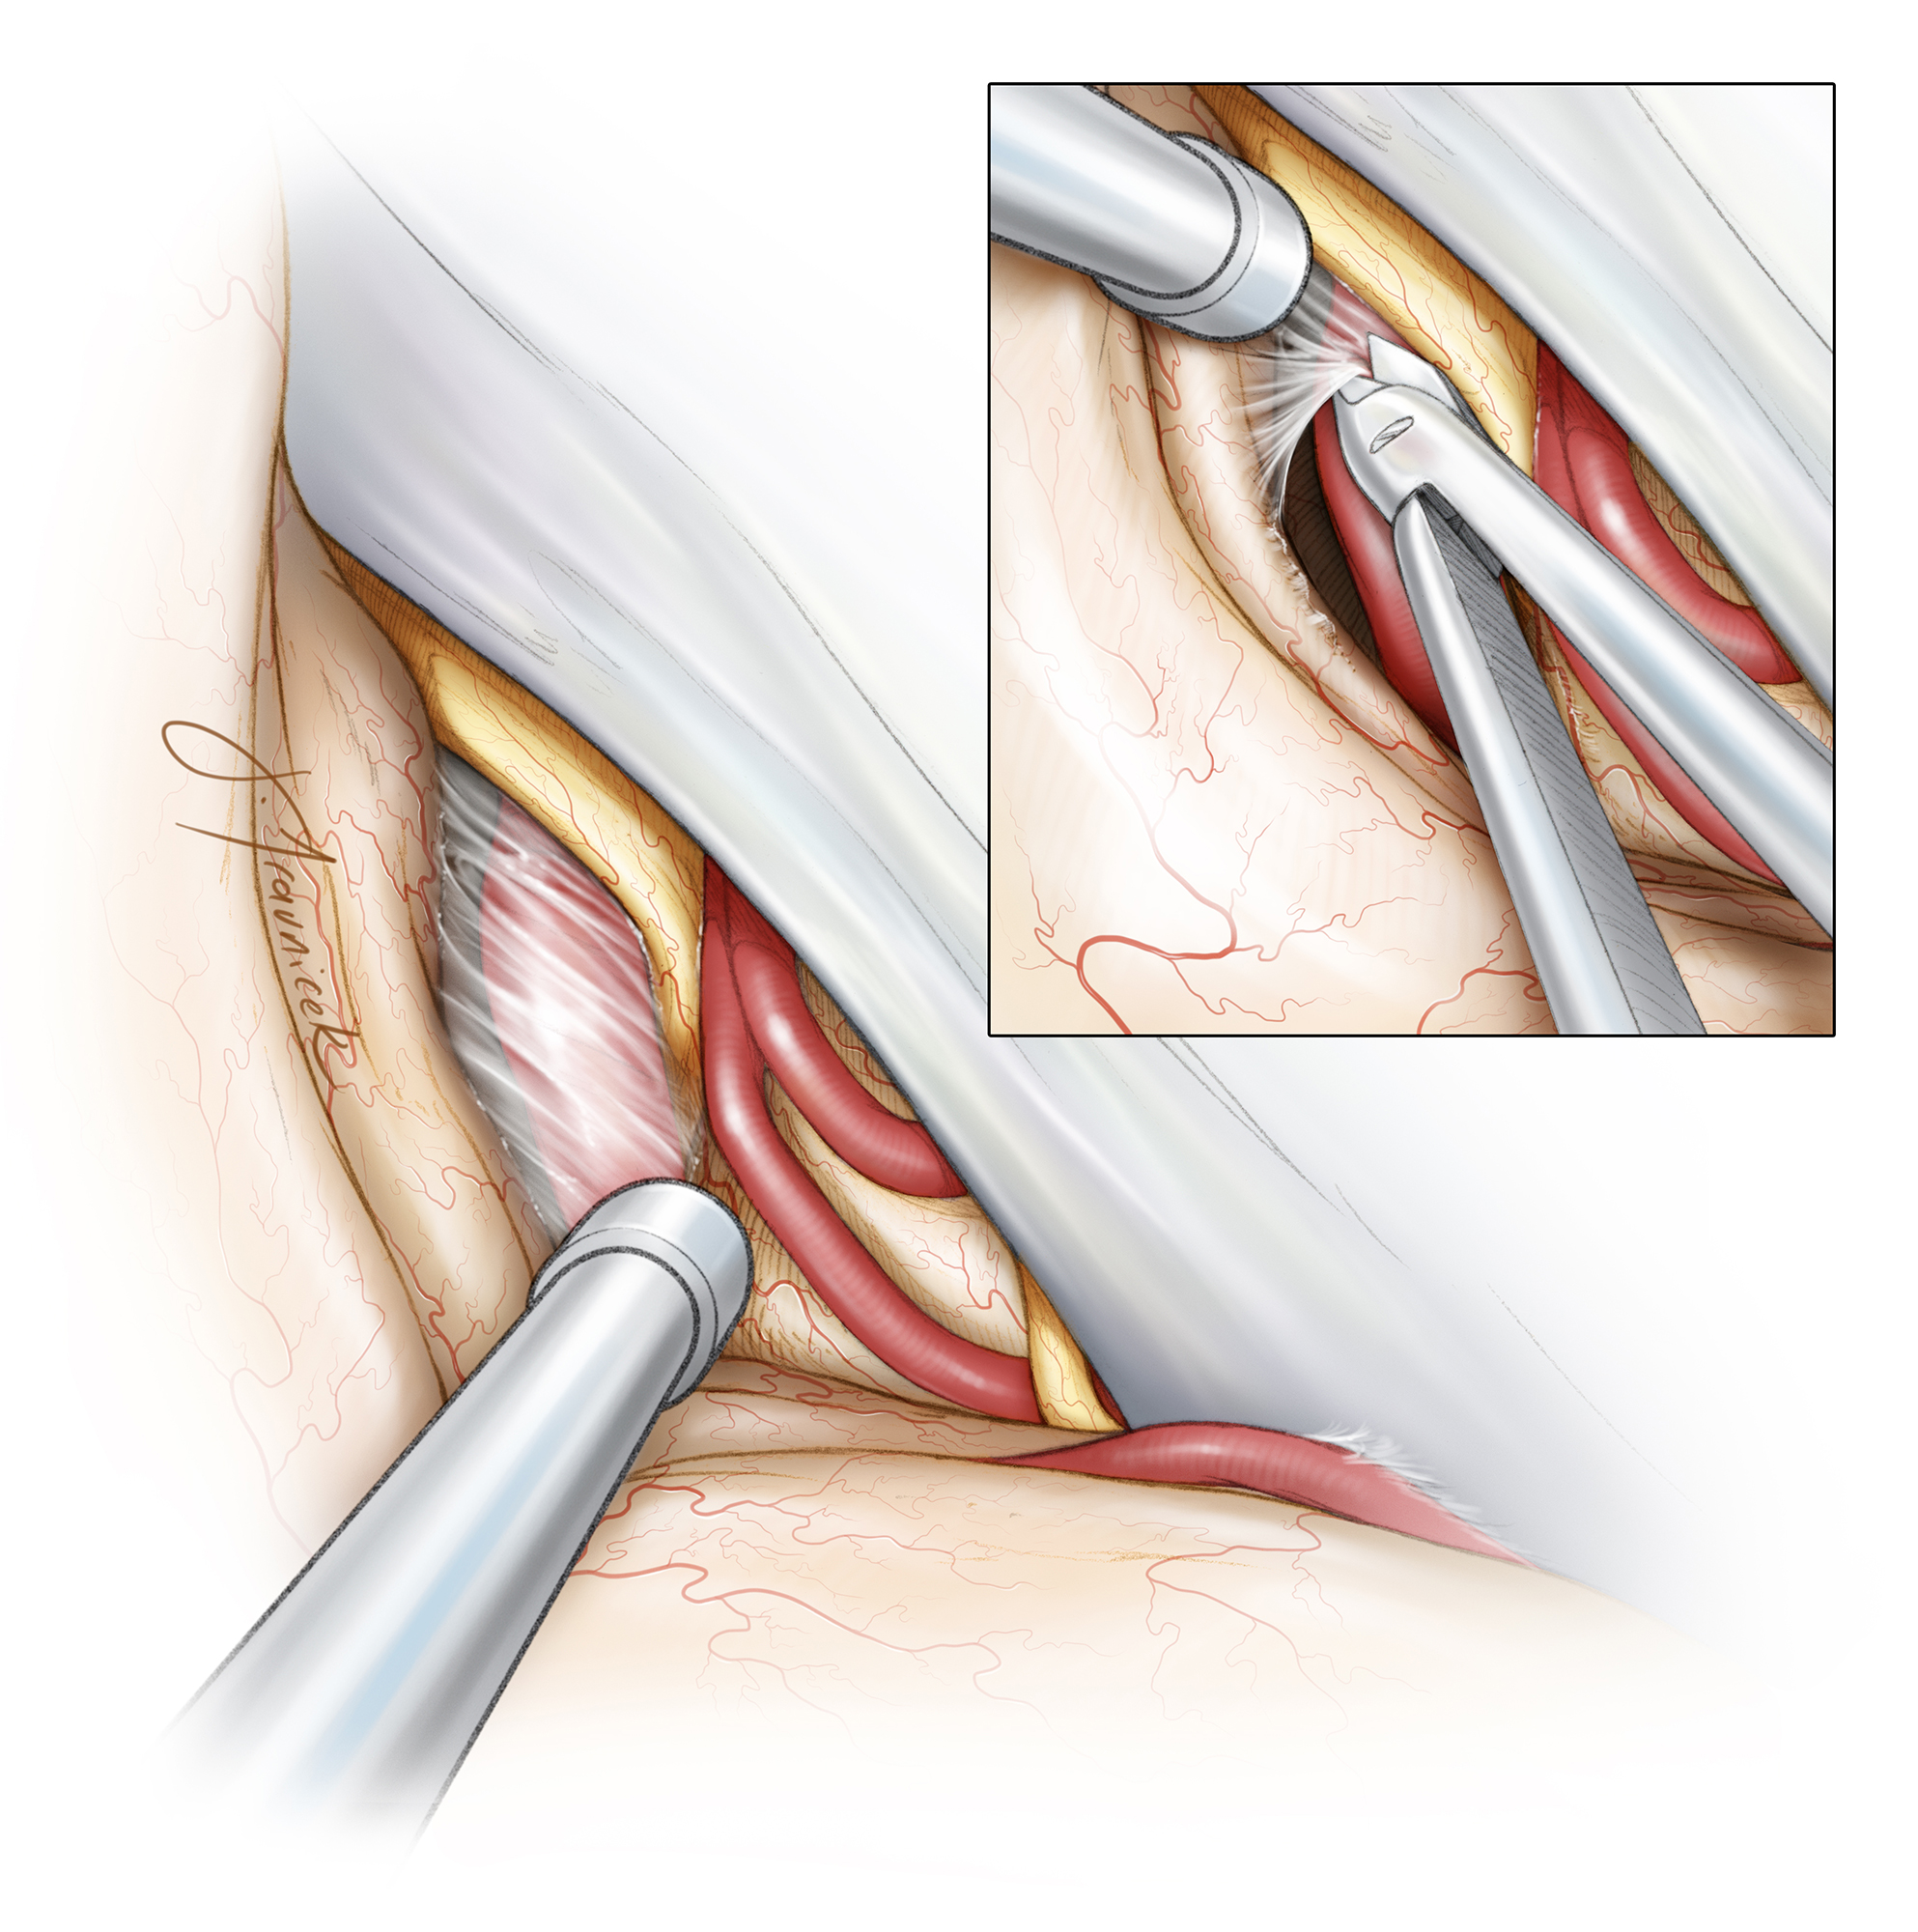
Figure 5: The arachnoid layers over the ambient cistern are exposed upon dynamic elevation of the temporal lobe. The distal oculomotor nerve is left attached to the uncus while the trochlear nerve and PCA vessels remain visible within the operative field. Early identification of the trochlear nerve is imperative for its protection during the tentorial incision. The edge of the tentorium may need to be gently reflected using a right-angle blunt dissector to uncover the entry point of the trochlear nerve into the tentorial edge.

Figure 6: The temporal lobe is mobilized superiorly while two retraction stitches are placed along the edge of the tentorium, just behind or posterior to the point where the trochlear nerve enters the tentorium. This maneuver permits lateral retraction of the tentorial edge, potentially sparing a tentorial incision. If necessary, a tentorial incision is made preferably behind the insertion point of the trochlear nerve, using a round knife, to expand the inferior operative trajectory for a low-lying aneurysm. The trochlear nerve is then mobilized medially and even freed from its intradural canal at the tentorium before reaching the cavernous sinus.
There are two key steps involved with a tentorial incision so that the tentorial leaflets are reflected anterolaterally and posterolaterally. After the tentorial incison is made just posterior to the entrance of the nerve into the tentorium between two retention sutures, then: 1) the trochlear nerve is released from its dural canal up to its entrance into the cavernous sinus, and 2) the tentorial incision is extended up to the Meckel’s cave. The resultant supra- and infratrochlear operative corridors provide numerous additional working angles for a low-lying basilar apex region aneurysm.
The edge of the tentorium is coagulated, and the tentorial incision is extended. Brisk venous bleeding from the tentorial venous lakes is controlled using thrombin-soaked Gelfoam packing into the leaflets of the tentorium.
Based on anatomical considerations for exposure of the aneurysm, the tentorial incision may have to be made along the edge where the nerve has already entered the tentorium. This incision may sacrifice the nerve; but recovery of function is highly likely via accommodation within the first 6 weeks.
Aneurysm Dissection
Once proximal control is established, dissection proceeds across the anterior face of the basilar trunk away from the perforators to identify the contralateral P1. The contralateral oculomotor nerve confirms that the P1 is not mistaken for the SCA. Gentle posterior retraction of the basilar trunk facilitates this key step.
Although the PCA is usually larger than the SCA, fetal circulation can result in a diminutive P1 that approaches the size of the SCA. These hypoplastic P1 segments can supply surprisingly robust thalamoperforators. Once the contralateral P1 is identified, the basilar apex must be gently mobilized anteriorly, out of the interpeduncular cistern, so the operator can identify all the thalamoperforators. Slight dynamic retraction of the cerebral peduncle is often necessary for discovery of the more distal perforators.
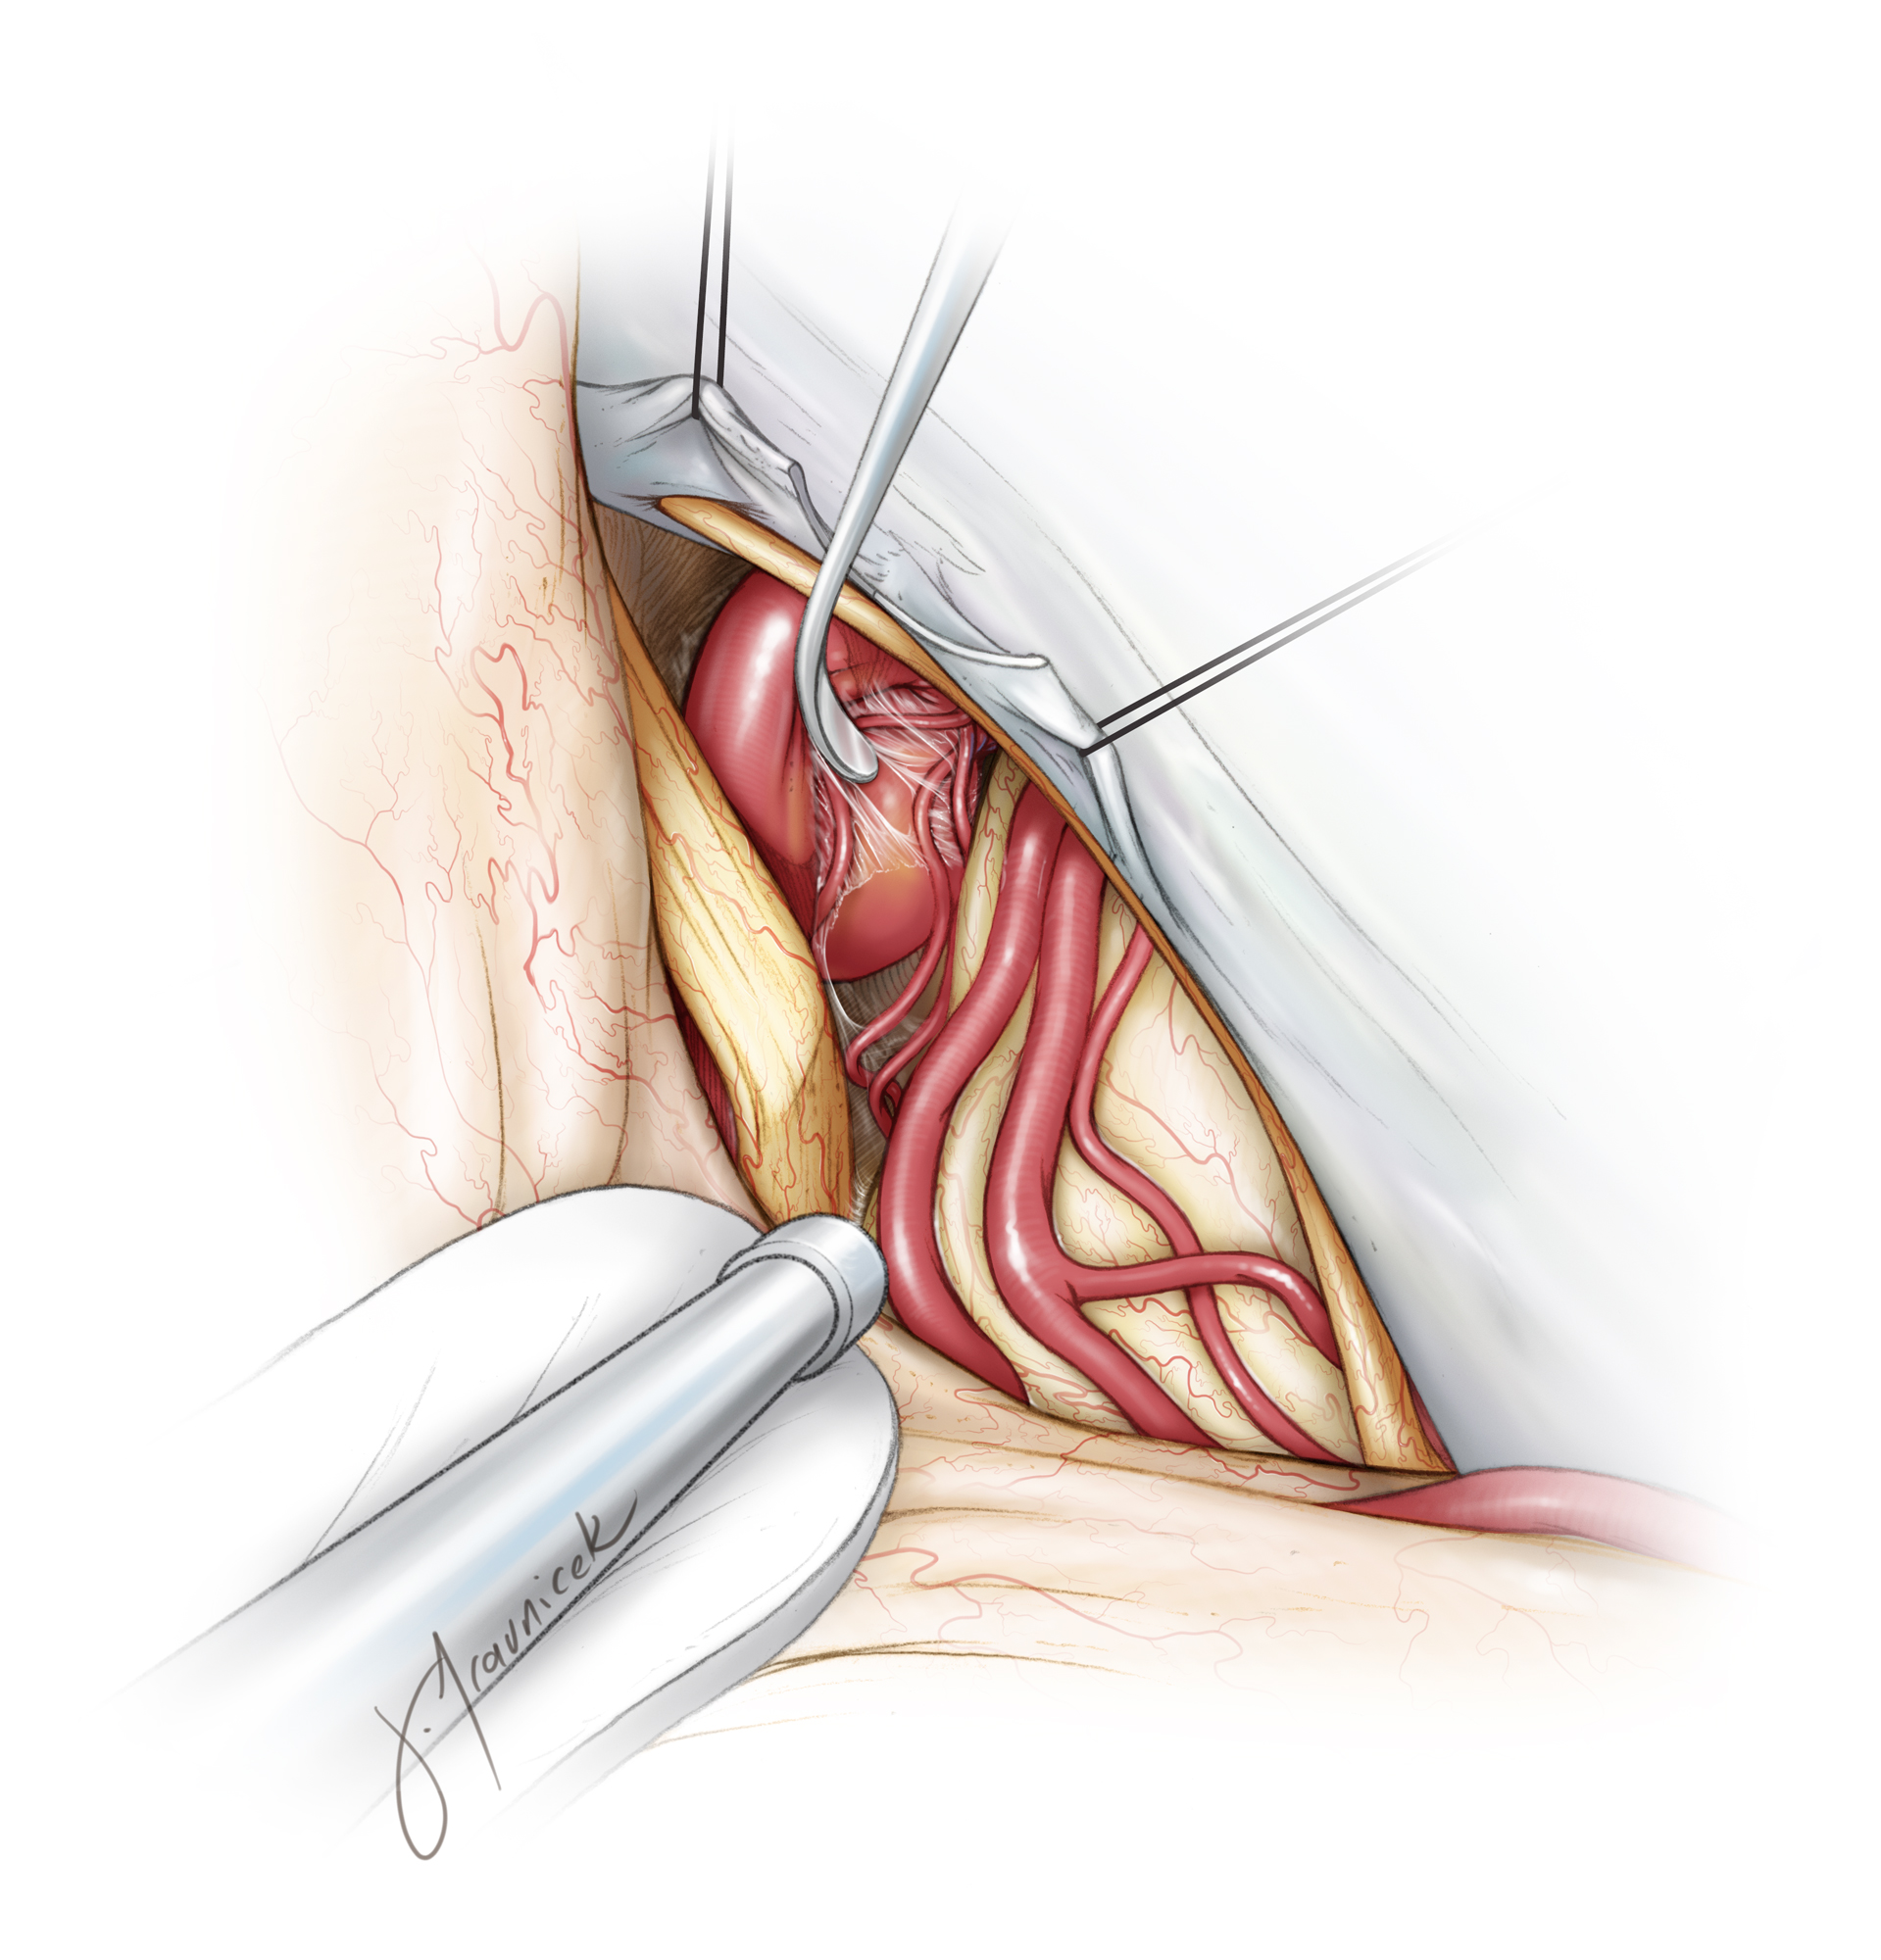
Figure 7: The tentorium is incised between stitches to improve the inferior viewing angles and secure reliable proximal control. The available lateral-to-medial operative trajectory provides an obstructed view of the basilar apex perforating vessels behind the aneurysm neck. However, the contralateral SCA and P1 branches are covered by the aneurysm.
The oculomotor nerve is an important anatomic landmark for locating the SCA and P1 branches. The ipsilateral P1 branch is often hidden within the superior aspect of the operative field underneath the parahippocampus; further temporal lobe retraction is required for its exposure. If the more distal segment of the P1 is not readily visible, aggressive temporal lobe retraction is avoided and the SCA is used as the anatomic landmark to reach the basilar trunk.

Figure 8: Gentle posterior mobilization of the aneurysm sac identifies the contralateral P1 origin. This maneuver barely exposes the origin of this vessel. Additional identification of the P1 origin is possible only during final closure of the permanent clip blades. Many of the high-risk maneuvers around the aneurysm are performed using periodic temporary occlusion of the basilar trunk.
Clip Application
I use the fixed retractor blade to hold the temporal lobe during final clip maneuvering and application; the axis of the suction device during manipulation of the P1 and perforating vessels may not overlap with the axis of temporal lobe retraction.
I use the tip of the handheld suction device (under low suction force) as a fine dissector to manipulate the vasculature and maneuver the desirable structures around and within the clip blades.
Anteriorly Projecting Aneurysms
Although anteriorly projecting aneurysms point away from the thalamoperforators, the contralateral P1 can be challenging to view because it is blocked by the aneurysm. Often the best way to visualize the contralateral P1 origin is to place a tentative permanent clip across the aneurysm, precisely maneuvering the distal clip blades during their final 2 to 3 mm of closure so that the P1 is preserved.
Another technical challenge is the occasional adherence of the aneurysm dome to the posterior clinoid dura. Even gentle manipulation of the sac can lead to bleeding. Often simply releasing the retraction on the aneurysm, allowing the aneurysm to fall back onto the clinoid dura, is sufficient to decrease the bleeding. Microdissection of the aneurysm under temporary basilar artery occlusion is mandatory in these circumstances.

Figure 9: An anterior- or superior-projecting aneurysm obscures the contralateral P1 origin. I use the straight fenestrated blades to collapse the neck, incorporate the ipsilateral P1 and its corresponding perforators into the fenestration. This technique uncovers the origin of the contralateral P1. As the clip blades are engaged and closing, the contralateral P1 origin comes into view; final minor adjustments in the angle of the blades can be made to preserve its origin.
Posteriorly Projecting Aneurysms
Posterior-projecting aneurysms adhere to the thalamoperforators along their posterior border. These small and vulnerable arteries must be dissected off sharply from the deflated sac at high magnification using temporary occlusion.
Once the aneurysm neck is free of perforators, two clipping options are available. The first is to clip behind the ipsilateral P1 with a straight clip, gently mobilizing the P1 anteriorly to view the aneurysm neck. Care must be taken so that the contralateral oculomotor nerve is well visualized and not included within the blades. The second option is to use a fenestrated clip, incorporating the ipsilateral P1 in the fenestration. The latter is my preference when possible.

Figure 10: The ipsilateral P1 often lies directly across the aneurysm neck; this configuration is ideal for a fenestrated clip. The contralateral P1 and its proximal perforators must be clearly visualized to confirm that they have not been included within the clip blades. It is important to inspect the entire length of the blades for any compromise of the perforators.
Finally, after sac exclusion has been confirmed on fluorescence angiography, the dome is penetrated and the sac mobilized anteriorly so that I can ensure the safety of all perforating arteries, especially those emerging from the distal basilar trunk and proximal contralateral P1.

Figure 11: A low-lying basilar bifurcation aneurysm was tackled via a right-sided subtemporal approach (upper row). The oculomotor nerve is the cornerstone landmark for this approach; the PCA (red arrow) and SCA (white arrow) were identified based on the nerve (center of the field) (middle row). Two tentorial sutures were used to retract the tentorium while a small tentorial incision between the sutures facilitated proximal control over the basilar trunk. A straight fenestrated clip kept the ipsilateral P1 and its perforators out of harm’s way (lower row-white arrow).
Combined Projections
Rarely does the surgeon encounter an aneurysm that has both anterior and posterior lobes. This so-called “cauliflower” configuration is not a suitable candidate for the anterior transsylvian approach because the posterior clip blade can easily perforate the posterior lobe that is hidden from the anterolateral trajectory.
An effective strategy is to use a tentative fenestrated clip to close the distal or proximal neck, gathering the large sac and allowing visualization of the contralateral anatomy. Next, a tandem clip is used to close the remaining neck. This type of aneurysm is more safely treated through the subtemporal route because the posterior lobe can often project inferior to the neck and behind the basilar artery.
Pearls and Pitfalls
- The major pitfall of the subtemporal operation is when the contralateral SCA is mistaken for the P1. Identification of the contralateral oculomotor nerve ensures that the P1 candidate courses superior to it.
- In most cases, the contralateral P1 origin and its perforating vessels cannot be reliably seen until application of the permanent clip. Aneurysm deflation is imperative for further inspection and final safety of the clip construct.
- Anteriorly projecting aneurysms can become adhered to the dura of the posterior clinoid or other surrounding structures. The restricted space allotted by the subtemporal route significantly limits the available working angles and operative maneuvers to deal with potentially disastrous moments. I always remind the anesthesiologist that adenosine can save lives, as it has in the past for my patients.
References
Batjer HH. Aneurysms of distal basilar artery, The subtemporal approach, in: Samson DS, Batjer HH (eds): Intracranial Aneurysm Surgery: Techniques. Mount Kisco, NY: Futura Publishing, 1990.
Lawton, M. Basilar artery bifurcation aneurysms, in: Seven Aneurysms, Tenets and Techniques for Clipping. New York: Thieme Medical Publishers, 2011.
Related Materials
Available Through the Atlas
-
A modified anterior temporal approach for low-position aneurysms...
-
Subtemporal approach for distal basilar occlusion for giant aneur...
-

Extradural temporopolar approach to lesions of the upper basilar...
-
Zygomatic approach for lesions in the interpeduncular cistern
-
The subtemporal, transcavernous, anterior transpetrosal approach...
-
Aneurysms of the basilar artery trunk
-
Custom-tailored transdural anterior transpetrosal approach to ven...
-
Fronto-temporo-orbitozygomatic craniotomy and "half-and-half" app...
Unavailable Through the Atlas
-

Factors Determining Surgical Approaches to Basilar Bifurcation An...
-
Extended subtemporal transtentorial approach to the anterior inci...
-
The anterior subtemporal, medial transpetrosal approach to the up...
-
Aneurysms
-
Microsurgical Approaches to the Perimesencephalic Cisterns and Re...
-
The pretemporal approach to the interpeduncular and petroclival r...
-
Basilar aneurysm surgery: The subtemporal approach with section o...
-
Comparative analysis of anterior petrosectomy and transcavernous...
-
Subtemporal approach to basilar bifurcation aneurysms: Advanced t...
-
The temporo-polar approach to basilar artery aneurysms with or wi...
-
Surgical technique to retract the tentorial edge during subtempor...
Please login to post a comment.