
Suturing and Closure Free

Introduction
To develop good suturing techniques, the surgeon must be familiar with basic details of the suture types and needle and suture sizes. The best techniques will involve the appropriate selection of suture size and needle type for the anticipated tissue closure.
The discussion that follows includes an overview of available suture sizes, a brief discussion of suture types, and an overview of suture needles. After this overview, a step-by-step guide to appropriate closure techniques is provided.
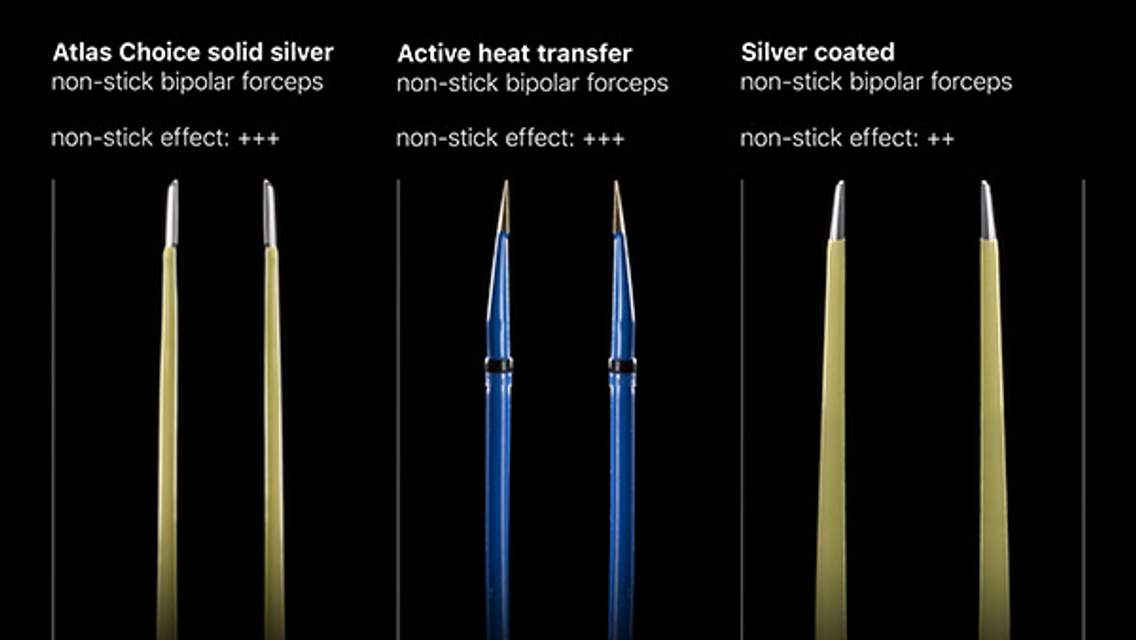
ATLAS Choice Bipolar Forceps
Designed for your every surgical maneuver
Five tip sizes for brain and spine procedures
Unparalleled non-stick and low-profile features
The Suture
“Suture” can be generally defined as a stranded material used to approximate 2 tissues. Sutures have been used since 2000 BC for the purposes of wound closure. Modern-era advances have brought a wide variety of suture materials to the operating room, each with multiple advantages and disadvantages.
The surgeon must be knowledgeable of the particular features of the suture and textile nature of the tissue type being reapproximated. It is also critical to understand the healing properties of the specific tissue to assist with suture selection. The demand on a suture is proportional to the tensile strength across the wound.
There are many properties to consider regarding the suture, including its filamentous components, capillarity, diameter (referred to as size), tensile and knot strength, memory, and elasticity. The ideal suture is one that has maximal tensile strength, knot security, low capillarity, a high degree of smoothness, and minimal tissue reactivity.
For a thorough understanding of these properties of the suture, I provide a summative discussion of the attributes of a variety of suture types relevant to everyday operative needs.
Suture Material
A major distinction among suture materials is whether they are monofilamentous or multifilamentous (ie, woven) (Table 1). Monofilamentous sutures are advantageous because they inflict minimal tissue trauma, harbor fewer bacteria, and decrease capillarity. However, they pose a greater challenge for knot tying, elasticity, and burial. In contrast, multifilamentous sutures possess higher tensile strength and result in easier but stronger knotting; the same advantages are conferred by biological sutures. However, advantages of the multifilamentous sutures come with a cost of greater capillarity, which promotes bacterial harboring. The presence of multiple filaments also increases the trauma induced by passage of the suture through the tissue.
An additional point of distinction is whether the suture is absorbable or nonabsorbable. Absorbable sutures can further be categorized as biological or synthetic.1 Biological products include chromic gut (gut) and plain gut (gut) sutures, and synthetic absorbable sutures include Vicryl Rapide (polyglactin), Monocryl (poliglecaprone), coated Vicryl (polyglactin), and PDS II (polydioxanone) suture.
Nonabsorbable sutures also can be categorized as biological or synthetic. Synthetic products confer the advantage of being inert, which minimizes the inflammatory reaction after placement. The consistent hydrolysis allows for a predictable absorption time line. The only current biological nonabsorbable suture is Perma-hand (silk). The synthetic nonabsorbable sutures include Mersilene (polyethylene terephthalate), Ethibond (polyester, referred to as dacron), Prolene (polypropylene), Pronova (hexafluoropropylene), Ethilon (polyamide, referred to as nylon), Nurolon (polyamide), and stainless steel.
| Suture Type | Composite Material | Mono-filament | Synthetic | Support (No. of Days) | Absorption (No. of Days) | Use(s) |
| Absorbable | ||||||
|
Plain gut |
Bovine or ovine intestine | Yes | No | 3–4 | Variable | General soft-tissue approximation |
| Chromic gut | Bovine or ovine intestine | Yes | No | 10-14 | >120 | General soft-tissue approximation |
| Vicryl | Polyglactin 910 | No | Yes | 14-21 | 90 | General soft-tissue approximation |
| Vicryl Rapide | Polyglactin 910 | No | Yes | 7-10 | 42 | Superficial soft-tissue approximation (skin and mucosa) |
| Coated Vicryl | Polyglactin 910 | Both available | Yes | 30 | 56-70 | Soft-tissue (skin and mucosa) |
| Monocryl | Poliglecaprone 25 | Yes | Yes | 20 | 91-119 | Superficial soft-tissue approximation (skin and mucosa) |
| PDS II | Polydioxanone | Yes | Yes | 30 | 180 | Microsurgery, neural and cardiovascular tissue |
| Nonabsorbable | ||||||
| Perma-hand silk | Silk | No | No | ∞ | ∞ | Catheter suturing, vascular ligation |
| Ethibond | Polyester (Dacron) | Both available | Yes | ∞ | ∞ | Vessel anastomosis, prosthetic material placement |
| Prolene | Polypropylene | Yes | Yes | ∞ | ∞ | Contaminated or infected wounds |
| Ethilon | Polyamide (Nylon) | Both available | Yes | ∞ | ∞ | Scalp closure, microsurgery |
| Nurolon | Polyamide (Nylon) | Yes | Yes | ∞ | ∞ | Vascular synthetic prostheses, dural closure |
| Pronova | Hexafluoro-propylene | Yes | Yes | ∞ | ∞ | Contaminated or infected wounds, general soft-tissue approximation |
| Mersilene | Polyethylene terephthalate | No | Yes | ∞ | ∞ | General soft-tissue approximation |
| Surgical steel | Stainless steel | Both available | Yes | ∞ | ∞ |
Abdominal wall closure, sternum closure, retention |
When choosing the appropriate absorbable suture, it is critical for the surgeon to know its expected wound-support time and 50% tensile strength time point. Table 1 lists suture types along with their filamentous characteristic, tensile strength time course, and time to completed absorption.
Suture Size
Suture size is a standardized measurement according to US Pharmacopeia (USP) nomenclature.2 Measurements, which range from 1 to 6, were based on manufactured products large enough to be compared with musical or tennis racquet strings. As technology improved, the size of suture that could be produced became significantly smaller. To continue with the same naming convention, a 0 was added to the end of the USP designations to denote smaller sizes (see Table 2 for an overview of sizing).
| USP Size | Metric Diameter (Gauge) |
Limits on Average Diameter (mm) |
|
| Minimum | Maximum | ||
| 0 | 3.5 | 0.35 | 0.399 |
| 2-0 | 3 | 0.30 | 0.339 |
| 3-0 | 2 | 0.20 | 0.249 |
| 4-0 | 1.5 | 0.15 | 0.199 |
| 5-0 | 1 | 0.10 | 0.149 |
| 6-0 | 0.7 | 0.070 | 0.099 |
| 7-0 | 0.5 | 0.050 | 0.069 |
| 8-0 | 0.4 | 0.040 | 0.049 |
| 9-0 | 0.3 | 0.030 | 0.039 |
| 10-0 | 0.2 | 0.020 | 0.029 |
| 11-0 | 0.1 | 0.010 | 0.019 |
| 12-0 | 0.01 | 0.001 | 0.009 |
The Needle
Suture needles have several mechanical parameters for surgeons to consider (Figure 1). The needle point, body, and swage are important landmarks of the needle. The swage is the end of the needle that is connected to the suture. The chord length is defined as the direct distance from the needle’s point to the swage. This measurement should not be confused with length, which is the distance along the curvature of the needle from the swage to the point.
The extent of curvature for the needle is defined as the fraction of a circle that the needle measures (eg, 1/4 circle or 5/8 circle). The radius is measured as the radius of the circle by which the extent of curvature is defined.

Figure 1: Illustration of suture needle properties.
Appropriate needle selection is particularly important for improving surgeon efficiency; therefore, the surgeon should be familiar with the various types and sizes of needles for optimizing wound closure.
Available needle shapes are as follows (Figure 2):
- Straight
- 1/4 circle
- 3/8 circle
- 1/2 circle
- Subtypes (from larger to smaller): CT, CT-1, CT-2, and CT-3
- 5/8 circle
- Compound curve
- Ski (half-curved)
- Canoe (half-curved at both ends of a straight segment)

Figure 2: Needle shapes.
Needles have different types of points to appropriately grip the adjacent tissue. The commonly utilized needle types for neurosurgery are overviewed below (Figure 3). Generally, needle points can be categorized as tapered, cutting, or blunt. Blunt needles are generally used for abdominal organ suturing and not frequently utilized for neurosurgical interventions; therefore, these needles will not be discussed in detail. Selection of needle type should be optimized for the tissue type being manipulated.

Figure 3: Needle point types: taper point, reverse cutting, conventional cutting, blunt and triangular, respectively.
Tapered needles include taper point and taper cutting needles. Taper point needles are useful for soft tissue approximation given that it permits dilation of the tissue rather than cutting the tissue. The sharpness of the needle varies dependent on the taper ratio and can be optimized for the tissue being sutured. Tissue types to consider using a taper point needle for include subcutaneous layers and dura.
Taper cutting needles combine a taper point and reverse cutting edge to permit penetration of the needle through dense tissue without the needle path exceeding the diameter of the suture material. The taper body allows for passage of the needle without threat of cutting the surrounding soft tissue.
Cutting needles include both conventional cutting needles and reverse cutting needles. Conventional cutting needles are commonly used for closure of the skin. The third cutting edge along the triangular apex of the concave surface allows for a very sharp edge and maximal cutting potential although are greater risk for cutting through tissue.
Reverse cutting needles have greater strength to resist deformity than conventional cutting needles. This configuration decreases the likelihood of the suture pulling through the tissue. This feature along with the cutting nature of the needle makes them ideal for penetrating durable tissue such as skin or tendons.
Commonly used tapered needles for neurosurgical interventions include:
- CT (circle taper) – taper point, ½ circle, 40mm
- CT-1 – taper point or taper cutting, ½ circle, 36mm
- CT-2 – taper point, ½ circle, 26mm
- CT-3 – taper point, ½ circle, 22mm
- CTX – taper point, ½ circle, 48mm
- SH (small half circle) – taper point, ½ circle, 26mm
- SH-1 – taper point, ½ circle, 22mm
- SH-2 – taper point, ½ circle, 20mm
- BV-100-4 (blood vessel) – taper point, 3/8 circle, 5mm
- BV-75-3 - taper point, 3/8 circle, 4mm
- BV-50-3 – taper point, 3/8 circle, 3mm
Commonly used cutting needles for neurosurgical interventions include:
- PS-1 (plastic skin) – reverse cutting, 3/8 circle, 24mm
- PS-2 -- reverse cutting, 3/8 circle, 19mm
- PS-3 -- reverse cutting, 3/8 circle, 16mm
- PSL (plastic skin large) -- reverse cutting, 3/8 circle, 30mm
- PSLX (plastic skin extra-large) -- reverse cutting, 3/8 circle, 39mm
- FS-1 (for skin) - reverse cutting, 3/8 circle, 24mm
- FS-2 - reverse cutting, 3/8 circle, 19mm
- FSL (for skin large) – reverse cutting, 3/8 circle, 30mm
- FSLX (for skin extra-large) - reverse cutting, 3/8 circle, 39mm
- P-3 - reverse cutting, 3/8 circle, 13mm
Wound-Closure Techniques
Wound closure begins with the appropriate use of the needle driver. Proper technique will ensure surgeon efficiency and improved dexterity during the suturing process. Properties relevant to the needle driver are weight, tensile strength, and ergonomics of the instrument. The size of the needle holder should be tailored to the depth of the surgical field, size of the suture, and strength of the tissue. Smaller needle drivers will enable finer movements and reduce tissue trauma.
Basic Suture Techniques
The next aspects of wound closure are the basic suturing techniques, which include the following:3,4,5
- simple interrupted (Figure 4A)
- simple continuous (Figure 4B)
- horizontal mattress (Figure 5)
- vertical mattress (Figure 6)
- subcuticular continuous (Figure 7A)
- subcuticular interrupted (Figure 7B)

Figure 4: The simple stitch technique is a means of tissue approximation under low tension. The needle is inserted perpendicular to the epidermis and through the thickness of the dermis. The suture should then travel underneath the dermis to the opposite side of the wound, before exiting the epidermis perpendicularly. Both the simple interrupted and simple continuous methods are illustrated. I use the continuous technique with 3-0 monocryl stitch to close the skin for scalp incisions.
Simple Interrupted Suture: Right Hand Dominant
Simple Interrupted Suture: Left Hand Dominant
Continuous Suture: Right Hand Dominant
Continuous Suture: Left Hand Dominant
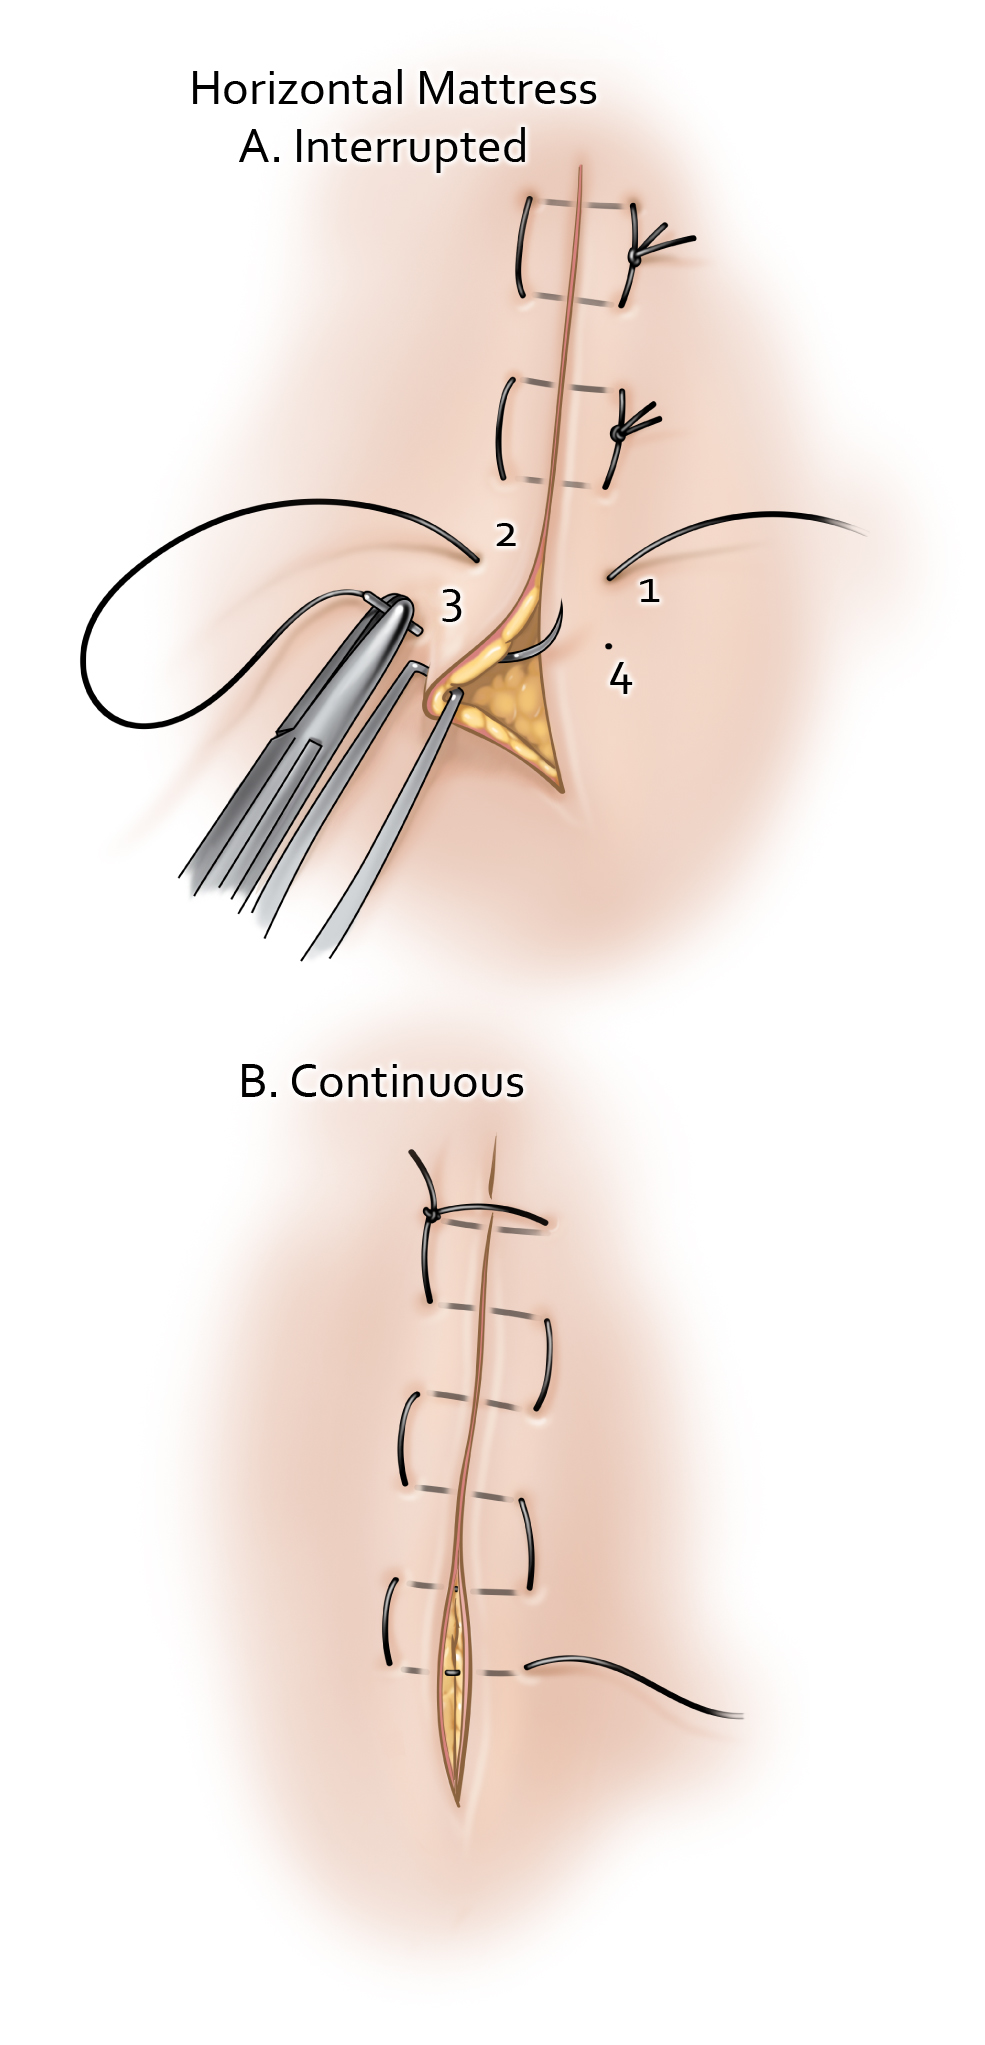
Figure 5: Horizontal mattress suturing better approximates tissue under high tension, particularly when the margins are friable or fragile after redo operations. The cosmetic outcome from this suture type can be suboptimal. Therefore, these sutures can be combined with other more cosmetically desirable suturing styles such as simple interrupted or vertical mattress suturing.
Horizontal Mattress Suture: Right Hand Dominant
Horizontal Mattress Suture: Left Hand Dominant

Figure 6: Vertical mattress suturing results in better eversion of the tissue and therefore can be a good strategy for augmenting wound closure when the quality of the tissues involved is tenuous. This advantage is provided by the combination of both deep dermal and epidermal suturing. I use vertical interrupted mattress suturing for redo craniotomies where the skin edges are not as healthy and accurate approximation of the skin edges is critical for healing.
Vertical Mattress Suture: Right Hand Dominant
Vertical Mattress Suture: Left Hand Dominant

Figure 7: The subcuticular suturing technique is the standard technique for cosmetic skin closure. Both the interrupted and continuous suturing techniques involve reapproximating the dermis. The interrupted technique involves an inverted suturing technique to ensure the knot is buried. The needle should enter the subcutaneous tissue and then pass through the dermal layer before exiting again in the subcutaneous tissue. The continuous suturing technique requires an anchoring tie 2-3 mm from the apex or if a knotless technique is being used, the needle can be passed into the dermis at the apex to start the closure. The dermal approximation should be performed using uniform depth bites parallel to the incision line. Following completion of the incision line, the suture can be tied at the apex and brought through the epidermis in an exit stitch or the exit stitch can be used alone for a knotless technique.
Other Suturing Techniques
Continuous Interlocking Suture: Right Hand Dominant
Continuous Interlocking Suture: Left Hand Dominant
Two-Hand Tie: Right Hand Dominant
Two-Hand Tie: Left Hand Dominant
One-Hand Tie: Right Hand Dominant
One-Hand Tie: Left Hand Dominant
Tissue Approximation
The primary suture line is the superficial source of tension that holds the wound margins together. Either a continuous or interrupted suture technique can be used for this layer. See Figure 8 for correct demonstration of tissue approximation as well as examples of common mistakes in approximation.
The secondary suture line is additional layer(s) of suturing used for dead-space closure and bolster approximation of the wound. This layer is necessary for prompting wound healing by secondary or tertiary intention.

Figure 8: Achieving ideal tissue approximation requires consistent and meticulous technique. Correct simple suturing (A) will apply ideal tension across each stitch to avoid uneven approximation (B) or tissue strangulation (C). The appearance of correct tissue approximation, as well as common pitfalls are demonstrated. Skin inversion (E) and overlap (F) are some of the most common and easily avoidable errors that can seriously affect wound healing and lead to infection and other complications.
Needle Driver Tenets
Achieving efficient and satisfactory suturing technique requires appropriate needle handling via the needle driver.6
The first step should involve the appropriate selection of the size of needle driver. Larger needles often require use of a larger needle driver to allow more robust needle manipulations. Conversely, smaller needles are manipulated with more delicate and smaller needle drivers (i.e. 6-0 Prolene suture usually handled with Castroviejo needle holders).
Needle holders should be positioned in the hand with the thumb and index finger stabilizing the shaft of the needle driver. The third, fourth and fifth digits wrap around the needle driver for additional stability. This technique is referred to as “palming” the needle driver. To manipulate the ratchet mechanism, pressure can be applied by the thenar eminence.
The needle holder should be armed with the needle approximately 1/3 of the distance of the needle from the swage. If the needle driver jaws are applied at a distance outside ¼ to ½ the needle length from the swage, there is a risk of weakening the needle and prompting breakage. The correct needle position within the needle driver and pitfalls are illustrated in Figure 9.

Figure 9: The needle should be loaded on the needle driver ¼ to ½ of the needle length away from the swage. By ensuring the needle is held in this configuration, more of the needle is accessible for the stitch while the stability of the needle during manipulation is secured.
Fascial Closure
The cervicothoracolumbar fascial planes require the neurosurgeon to be familiar with appropriate fascial closure. These connective tissue layers provide a robust medium for tissue approximation. The appropriate selection for thoracolumbar and deep cervical fascial layers is usually 0 Vicryl sutures with either a CT or CT-1 needle. The sutures should be tied in an interrupted pattern with approximately 1 cm of space between each one.
Muscle Closure
Thoracolumbar and cervical paraspinal muscles should generally be reapproximated before fascial closure to reduce the extent of dead space and prevent seroma formation. Closure of this layer should be performed with 0 Vicryl sutures via either a CT or CT-1 needle. The throws should be interrupted with approximately 2 to 3 cm between sutures. The muscle layers do not require approximation to be as tight as those for the fascial layers, hence the greater distance between sutures. Muscle generally does not approximate well with sutures, and excessively tight approximation can lead to tissue necrosis and severe postoperative pain.
Subcutaneous Fat Closure
Similar to the muscle layer, the subcutaneous adipose tissue does not approximate well with sutures. Placing sutures within this layer reduces the amount of dead space and assists with the approximation of wound edges. This step is generally performed with 2-0 or 3-0 Vicryl interrupted sutures.
Galea Closure
Closure of the galea is an essential skill for cranial neurosurgeons. The appropriate approximation of the galea requires close 0.5- to 1-cm separation between 2-0 Vicryl sutures along the galeal layer. The suturing should be performed in an inverted interrupted manner. The dense connective and adipose tissue layers superficial to the galea should be minimally involved in closure of the galea itself, because these layers do not provide structural support, and their transgression will only threaten the vascularity of the skin. In addition, inclusion of the additional layers can threaten precise approximation of the skin edges during the next more superficial layer of closure.
Skin Closure
Closure of the skin depends on the region of tissue being approximated. In general, the tensile strength of skin is regained slowly during the healing process. The goal of closure is skin margin eversion and restoration of native skin tension.
Scalp skin closure is often performed with staples, separated by 0.5 to 1 cm along the cranial incision. As an alternative, the scalp can be closed with a running 2-0 or 3-0 Ethilon suture, with suture loops approximately 1 cm apart. Another alternative is to place a running Vicryl Rapide suture, which will absorb rapidly and therefore obviate suture removal in the postoperative phase.
Cervical, thoracic, or lumbar skin closure can be performed with a simple running 2-0 Ethilon suture and subsequently removed in 7 to 10 days. However, a running subcuticular 3-0 Monocryl suture and Dermabond overlying the primary suture line is used more commonly for spinal incision closure. Alternatively, staples can be applied.
In all cases of skin closure, suture or staple removal should be performed before epithelialization of the suture/staple tract, which reduces the risk of infection in the epithelized tract.
Conclusions
Proper closure techniques require the surgeon’s consideration of multiple situational factors, including tissue type, needle type, suture size, suture material, and tissue tension.
Contributor: Benjamin K. Hendricks, MD
References
- Ethicon. Wound Closure Manual. Ethicon, Inc, Somerville, NJ. 2007.
- USP monographs: nonabsorbable surgical suture. In Pharmacopaeia. Available at: http://ftp.uspbpep.com/v29240/usp29nf24s0_m80200.html. Accessed June 17, 2019
- Davis CT, Geck FA. Surgical Atlas and Suture Guide, 2nd Ed. Mosby, Wayne, NJ. 1992.
- Kantor, Jonathan (ed.) Atlas of Suturing Techniques: Approaches to Surgical Wound, Laceration, and Cosmetic Repair. McGraw-Hill Education. 1st edition, 2016.
- Kudur MH, Pai SB, Sripathi H, Smitha P. Sutures and suturing techniques in skin closure. Indian J Dermatol Venereol Leprol 2009; 75:425-34 (10.4103/0378-6323.53155).
- Trott, Alexander (ed.) Wounds and Lacerations Emergency Care and Closure. Elsevier. 4th edition, 2012.
Please login to post a comment.